Wednesday, 10 April 2013

Screen printing with CSM student Josse Pickard


Printing in the studio with Josse Pickard, third year Graphic Design student at Central St Martins. Here you can see his stunning Eagle and typography prints...


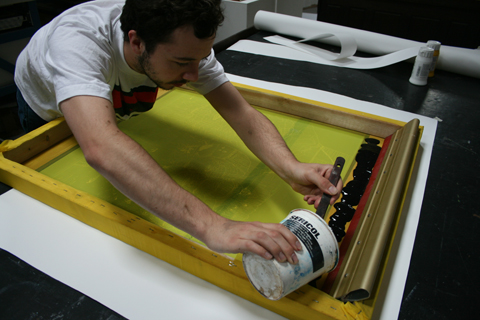
Serious concentration - final colour in a three colour print and yes that is a brick on the print table!


Great Eagle! - very slight miss on the registration.


The Acetate separations, you can see here that our acetate is slightly cloudy. Good for screen exposure but not if you're after clear acetate.


Typography poster...


Introducing Petra...

Screen Printing with CSM student Josh Saunders


Screen printing with Josh Saunders (an illustration student at CSM) in the studio last week.  Here you can see one of his incredible fine line illustrative drawings....


A close up detail of the Acetate we printed, some of the lines were as
fine as 0.2mm


Josh had made a wooden frame and we stretched a very fine mesh on it,
the tension wasn't great but it coated and exposed almost perfectly.


Printing with acrylic mixed with screen printing medium.


Getting the number of pulls right was problematic because of the fine lines
- after a few trials we used a textile squeegee which had a half rounded edge.


A screen stretched under proper tension would have made things easier -
but it's always good to be reminded that you can achieve great things
with basic materials!


Detail showing the final print - nice work !


Screen Exposure / Part 2 - Expose, wash off and print


Once you've separated the colours in your artwork, your separations are

ready to put onto acetate and then onto screen. If the print is made up
of more than one colour you will need registration crosses on your artwork.
Here are some visuals of a print we were doing in the studio last week
to demonstrate the rest of the process.

The acetate as it was coming off the printer showing the colour separations.


Lining up the acetates on the screen before exposing them to UV or Metal
Halide light. The black printed areas block the light meaning that the screen
coating underneath doesn't harden. Here you can see the
registration crosses on the acetate.


Therefore after the screen has been exposed and the acetates are removed,
the screen is washed out and the black areas washed away leaving a clear
mesh (yellow) to print through. The rest of the emulsion coating (pink) has
hardened and the ink will not pass through.
The edges of the screen are then taped to seal any open mesh.


Once the screen is dry any small pinholes have to be touched up with emulsion,
the screen is again exposed to UV light and then is ready to be printed.
Here printing the first colour.


Grey ink onto linen, the registration crosses are printed onto masking tape to
register each print.


Final print colour of four, checking the registration.


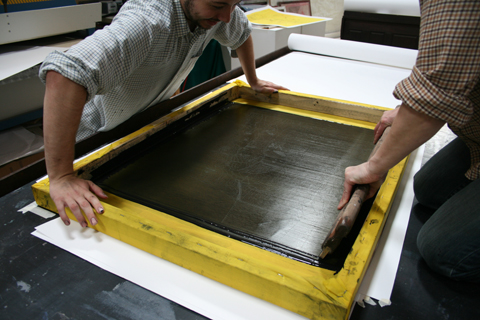
Lifting the screen to see the print after the final colour is printed.


The final (four colour) print onto linen.


(We loved this owl so much we put it into production. See it at our on line shop
at Sam Pickard's Shop)

Screen Exposure / Part 1 - Acetate printing...


If you've ever done any screen printing, you'll know that there are some magical moments throughout the process. The first is when your screen has exposed successfully and when you wash it off there's a sharp image and the detail is there that you had been expecting, without too many pin-holes or other holes in the emulsion to touch up.


The length of exposure varies depending on your exposure unit and the opacity of the image on the acetate (this is called the screen positive). Our exposure system uses two large overhead lights. The benefits of these are that we can expose very large screens, the downside is having to be careful to avoid getting a blurred image around the edges on the largest screens. We use very light spray of adhesive on the acetate to get around this. On a vacuum bed exposure unit the acetate is held tightly to the screen by air suction and this isn't necessary, but the maximum screen size is then limited by the unit size.

The process involves first putting your image onto acetate. Simplistically, you are making a black print onto acetate of every colour in your image that you wish to print.

Below shows a 1100mm wide acetate film being printed in the studio. Our printer prints a very opaque black and the acetate doesn't require any further treatment to increase its opacity.


Here are some of the acetates for my design 'Night and Day' which I printed for an exhibition earlier this year...


example of one of the background acetates...


and the foreground...


the finished print from these acetates, monochromatic in that instance.

Coating a screen


Working as a print and dye technician for a number of years, means I've coated a lot of screens, I know many of the things that can go wrong and (usually) how to avoid them.

There are a lot of different screen emulsions on the market. I use Folascreen DC - 200 which I've found to be a very good emulsion - it doesn't break down on the screen during use but comes off easily when you want to get it off the screen to re-expose another image.  Screen emulsion comes in two parts - the emulsion itself which is a viscous fluid, and a sensitiser, which is a powder. The sensitiser is chrome based and harmful - so care must be taken when handling this product.

Its worth knowing that the emulsion, which has a shelf life of about a year un-mixed, once it's been mixed with the sensitiser, only has a shelf life of between 4-6 weeks.

The sensitiser is dissolved in a small quantity of warm water and this is then added carefully and thoroughly to the emulsion. However carefully you do this it is impossible not to bring some air bubbles into the mixture and so once the emulsion is mixed it's best to leave it to rest for a few hours before coating a screen during which time the air bubbles will usually disperse (pop any on the surface which haven't).

First make sure your screen is clean and free of grease. Old screens can get quite stained with stencil images - there are a number of stencil removers on the market to clear this. I don't usually find it a problem. It's important that the screen is free of grease or the emulsion will not adhere properly and the coating will have a lot of pin holes - again there are a number of screen de-greasing products on the market, but hot water and washing-up liquid works fairly well on a less industrial level of printing.
I have always used Screenstretch for my screens, coating troughs and ancillary screen products.

Coating troughs have removable ends, as long as these are cleaned well after use, they will fit tightly to the ends of the trough so theres no leakage when the emulsion is poured into the trough.


They come in different lengths. While it's possible to coat a screen using a small trough by overlapping the emulsion - it's preferable to have a variety of length troughs for different sized screens - and select a trough to fits the screen that you're coating.
In order to coat the screen with an even coverage of emulsion - choose a coating tough that fits inside the  frame of your screen.

Sensitised screen emulsion is affected by light and will start to harden on the screen if exposed to daylight, so preferably coat your screen in low or safe light. If this is impossible, then coat them quickly and move to a dark place as soon as they are coated.
Pour more emulsion than you need into the coating trough to ensure you have enough to coat the screen.
The coating trough ends have a flat fronted edge. Tip the trough towards the mesh until the emulsion is touching the mesh evenly along the edge of the trough and the flat edge is pressed against the mesh. I use a plank of wood behind the screen (as you can see in the photos) to create a slight angle from the vertical which prevents the screen tipping forward or moving backward during coating. 

Pressing firmly and evenly against the mesh with the flat ends of the trough, pull the trough up steadily from the bottom of the screen to the top. One pull is usually enough but if your screen does not coat successfully the first time, re-coat it by going through exactly the same process again. Some emulsions require coating the screen on the back as well as the front, I only coat the front of the screen and have normally found this to be sufficient.


Too much or uneven emulsion on the screen can cause exposure problems. You can often correct  a badly coated screen by pulling the trough against the mesh again, tipped backwards away from the mesh (dry coating) to remove the excess emulsion on the screen. This may need to be done on the inside as well as the outside of the mesh.


Dry your screen in the dark and preferably horizontally to avoid drips running down the emulsion. I have to dry my screens vertically in my darkroom as I don't have a horizontal drying system. I use a fan heater to dry them quickly and it has rarely caused any problems, providing I've ensured that there's no excess emulsion on the screen first.
Here, a perfectly coated screen ready to be exposed!




First print exposed

Welcome to our print blog, where we discuss things relating to print and beyond.
To introduce ourselves, we are...

Pete Bishop, who has worked in the graphic design industry for 30 years working in and sometimes managing many of the top London design studios including Sampson|Tyrrell, Saatchi and Saatchi, Wolff Olins, Coley Porter Bell, and many more. He lectures in graphic design and is an Adobe certified expert/instructor.

Sam Pickard has a B.A. and M.A. in textile design and worked as a print and dye technician at East London University before starting her own business as a designer/maker in 1997. She has won many awards for her work and her designs have twice been short-listed for the British Design Awards. See more of Sam's work here.
We always hoped when we acquired our fantastic old garage (500 square metres) in North Devon 10 years ago that in conjunction with making our own work, we would set up a print facility, combining our expertise in the graphics and textile industries to run workshops, ourselves and with visiting practitioners, hold exhibitions and offer a design and print service. Finally 10 years on we are about to start that. Our blog will be regularly updated with news about print workshops, exhibitions, print info and anything else relevant to print (and dye).

It seemed a good idea to screen print the logo for this new venture, printing it at scale on a rough linen fabric which could then be scanned, scaled down and tweaked.


loading the screen with (pigment) dye.


printing (6 pulls) with the squeegee onto heavy weight raw linen.


it's a perfect print. 


trying a paper print - what a great red!


next black pigment on linen...cool dots.


Its called EXPOSED by the way!